Almost every LVP quote we write in the DMV ends with the same homeowner question. "Wait. Is this going to be glued down or just clicked together?" Most people have never had to think about it. The salesperson at the big box store usually does not bring it up. The Reddit threads make it sound like one method is fine and the other is a disaster, and the manufacturer blogs each say their preferred method is the only right answer.
The honest installer answer is that both methods work, both fail when done wrong, and the right choice depends on the substrate underfoot, the room, the building type, and what happens when a single plank gets damaged five years from now. Potomac Floors installs floating click-lock and glue-down LVP across Alexandria, Arlington, Fairfax, Tysons, Reston, Falls Church, Springfield, Ashburn, Bethesda, Rockville, and the broader DMV. Below is the working decision guide we walk homeowners through at the quote, with the per-room defaults we actually spec.
The short answer by room
Quick answer
Floating click-lock LVP is the right answer in roughly 80% of DMV residential installs: ground-floor and upper-floor rooms over plywood subfloor, second-story condo units over concrete with a sound underlayment, basements over a clean dry slab with the right vapor barrier, and any room where you want a cleaner repair path later. Glue-down LVP wins for slab-on-grade rooms with heavy rolling loads or commercial use, large open spaces where seams would otherwise telegraph, radiant heat installs over hydronic, and any room with a history of subfloor moisture you cannot fully eliminate. Same per-square-foot material cost in most cases. Labor and adhesive add roughly $1 to $2 per square foot to glue-down. The deciding factor is rarely the LVP itself.
The big practical difference: a floating floor moves with the room (expands and contracts seasonally, can be lifted and re-laid), and a glue-down floor is permanent (does not move, cannot be reused, and a single damaged plank turns into a careful localized cut-out repair). Pick the install method for the room, not the room's flooring spec sheet.
Floating and glue-down, explained
Quick answer
Floating LVP uses click-lock joints (a tongue-and-groove edge that snaps together) to form a continuous floating panel across the room. Nothing attaches it to the subfloor. An underlayment goes between the LVP and the subfloor for sound dampening and minor leveling. The whole floor moves as one piece with the room's temperature and humidity. Glue-down LVP is a smooth-edge plank (no click-lock joint) bonded directly to the subfloor with a flooring-grade adhesive. The bond is permanent, the plank does not move, and the floor sits a few millimeters lower than a floating install.
Floating click-lock is what most homeowners picture when they think "LVP." The plank has a milled tongue-and-groove on all four edges. Two planks click together at a slight angle, lay flat, and the joint locks. Add an underlayment (most modern LVP has a thin attached cork or foam pad, and we add a second acoustic underlayment in condos and townhomes where HOA sound specs require it). The crew works from one wall to the other, holds an expansion gap at every perimeter, and finishes with shoe mold or quarter-round to cover the gap.
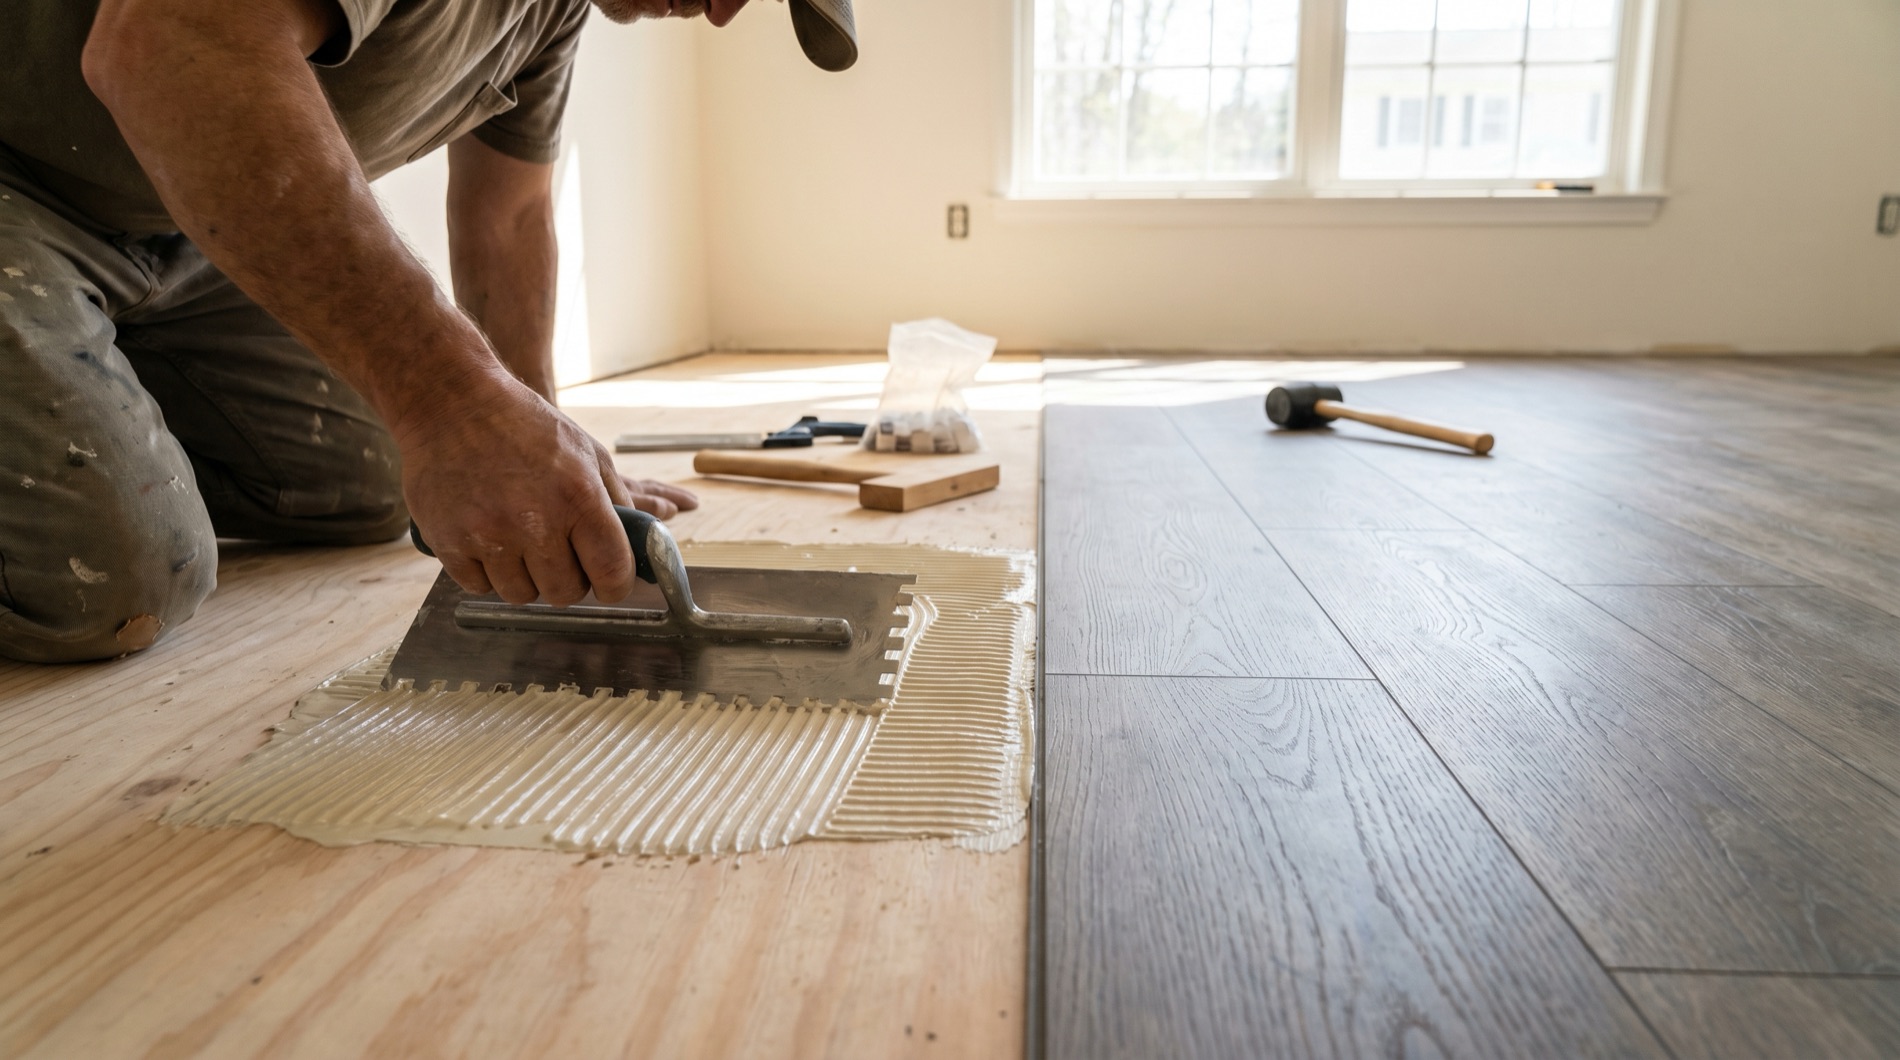
Glue-down LVP uses a smooth-edge plank. No click joint. The crew trowels a flooring-grade pressure-sensitive adhesive on the subfloor in working sections (usually about 50 to 80 square feet at a time), waits for the adhesive to reach the right open time (the manufacturer specifies it, usually 10 to 30 minutes), and then lays the planks tight against each other into the wet glue. A heavy roller follows behind to seat the planks into the adhesive. Once cured (usually 24 to 72 hours), the floor is bonded permanently to the subfloor. There is no underlayment, no expansion gap (or a much smaller one), and the finished floor sits flush with adjacent rooms more easily.
The third common variant is "loose-lay" LVP (a heavier vinyl plank with no click joint that sits on the subfloor under its own weight, sometimes with a perimeter adhesive bead). Loose-lay shows up in commercial and rental installs and we touch on it briefly in the FAQ. For residential DMV homes, the choice is almost always floating click-lock vs glue-down.
Floating LVP: when click-lock wins
Quick answer
Floating wins when you have a plywood-on-joist subfloor (almost every ground floor and second floor in a DMV stick-built home), when the room is a normal residential size with normal traffic, when you may want to pull the floor up someday for resale or layout changes, when individual plank replacement is a real possibility (pet households, kids' play rooms), and when sound transmission matters in an upper unit or condo. Faster install, lower labor cost, easier repair. The trade-off: small seasonal movement, slight underfoot feel difference from glue-down, and the perimeter expansion gap that needs trim to cover.
The case for floating click-lock starts with the substrate question. A typical DMV stick-built home (Federal-era colonial in Old Town, 1970s split-level in Vienna, 90s townhome in Reston, new construction in Ashburn) has plywood subfloor over engineered joists or dimensional lumber. The subfloor moves seasonally. Humidity expansion in summer, contraction in winter, and the joist span has a measurable amount of deflection under live load. A floating floor accommodates that movement without telegraphing it. A glued floor on the same substrate sometimes works fine and sometimes shows ghost lines along the joist edges within 2 to 3 years.
The case strengthens for upper floors and condos. Sound transmission is the issue. Click-lock LVP with a quality acoustic underlayment hits IIC 60+ when properly specified, which is what most DMV condo and townhome HOAs require for upper-unit floor swaps. A glued LVP install has no underlayment by design (the adhesive is the bond layer, no compressible foam allowed), so the sound transmission is worse. We default to floating click-lock with cork or rubber acoustic underlayment in every upper-unit condo job in Tysons, Reston, Old Town, Crystal City, and DC.
The case strengthens again for repair scenarios. Pet households (large dogs that drag toys, cats that scratch corners), kids' play rooms, and rental units all see localized damage. A floating floor lets us pull up one or two planks from a closet or doorway, replace the damaged plank in the middle of the room, and re-click the rest. A glue-down floor requires cutting the damaged plank out cleanly, scraping the cured adhesive off the subfloor without gouging it, applying a fresh adhesive bed in the small area, and color-matching the replacement plank to the now-aged surrounding floor. The labor for that single-plank repair is 4x to 6x the labor on a floating floor.
The trade-offs are real. A floating floor has a small "give" underfoot that some homeowners describe as feeling less solid than glue-down. The perimeter expansion gap (1/4 inch minimum on most products) needs shoe mold or quarter-round trim to hide; some homeowners do not want the trim. Long unbroken runs (over 40 feet in one direction) need a transition strip in the middle to break up the floating panel, not always desirable across an open living/dining area. And if the subfloor is uneven beyond manufacturer specs (more than 3/16 inch over 10 feet on most products), the click joints will eventually fail at the high spots. Subfloor prep is non-negotiable on a floating install.
Where floating fails: rooms with rolling loads (commercial dollies, restaurant chairs that drag, gym equipment), heated-floor installs over hydronic where sustained warmth makes the floating panel move more than the perimeter gap can absorb, and any room where the homeowner refuses the perimeter shoe mold and wants the LVP tight to a flush baseboard. For those rooms, glue-down is the right call.
Glue-down LVP: when adhesive wins
Quick answer
Glue-down wins for slab-on-grade basements in dry conditions with the right adhesive, commercial and light-commercial installs (offices, dental practices, gym lobbies), very large open rooms where a floating floor would need a midline transition, rooms with rolling loads or heavy point loads, hydronic radiant heat installs in poured slabs, and dock-flush installs against a heavy door or appliance where an expansion gap is not acceptable. The install is slower, the labor is higher, and the floor is permanent, but the finished result feels rock-solid underfoot and lasts in conditions a floating floor will eventually fail under.
The strongest case for glue-down is the slab-on-grade basement done right. A clean dry concrete slab with verified moisture readings (below 75% RH using ASTM F2170 or below 3 lbs per 1,000 square feet over 24 hours using ASTM F1869) takes a glued LVP install beautifully. The adhesive bonds permanently, there is no underlayment cavity for moisture to collect in, and the floor sits flush with adjacent rooms. We use vapor-barrier-rated pressure-sensitive adhesives (Mapei Ultrabond ECO 360, Bostik GreenForce, Roberts 2310) that act as their own moisture barrier up to a stated limit.
The case strengthens for large open spaces. A great room with a 50-foot continuous run across kitchen, dining, and living needs either a glue-down install or a floating install with a transition strip somewhere in the middle. Most homeowners hate the transition strip across an otherwise open floor. Glue-down lets the run go wall to wall in one direction without interruption, with no expansion gap visible at the perimeter (a 1/8 inch gap behind the baseboard is enough, and the baseboard hides it without shoe mold).
The case strengthens for commercial and rolling-load environments. Office chair casters, treadmill rollers, hospital beds, dental chairs, and rolling tool chests all put concentrated point loads and lateral shear on the floor. A floating floor flexes under those loads and eventually the click joints loosen near the high-traffic zones. A glue-down floor distributes the load into the subfloor and does not move. Almost every commercial LVP install we do at Potomac is glue-down for this reason.
The case strengthens for hydronic radiant heat. We covered this in our radiant heat flooring compatibility piece: sustained warmth from a hydronic system makes a floating floor move more than the perimeter expansion gap can absorb in a long room. Glue-down (with a heat-rated adhesive, Mapei Ultrabond ECO 575 is the one we use most) holds the planks in place against the heat and the slow cycling. Electric mat installs can use either method; hydronic almost always points to glue-down.
The trade-offs on glue-down are the install cost, the wait time, and the repair cost. The crew works slower (50 to 80 square feet at a time, waiting for adhesive open time), uses more material, and the homeowner cannot walk on the floor for 24 hours after the last section. Single-plank repairs five years out are expensive and color-match-risky. Pull-up-and-relocate-the-floor someday is impossible. The bond is for the life of the floor.
The DMV substrate question
Quick answer
Plywood subfloor over joists (almost every DMV ground-floor and second-floor room in a stick-built home): floating click-lock is the default. Concrete slab on grade (basements, some additions): either method works, glue-down is more forgiving long-term if moisture is controlled. Concrete slab upper-unit (Tysons high-rises, DC condos, Crystal City): floating click-lock with acoustic underlayment for HOA sound compliance. Old plank subfloor (1920s-1940s homes in Del Ray, Cherrydale, Takoma Park): floating click-lock over a 1/4 inch plywood overlay, never glue-down direct to the original planks. Radiant heat slab: glue-down with heat-rated adhesive.
Most DMV install decisions come down to the substrate, not the room. Walk through the common cases.
Plywood subfloor over joists. The dominant DMV residential substrate. Federal-era colonials in Old Town and Alexandria, mid-century split-levels in Vienna and Fairfax, 70s and 80s townhomes in Reston and Ashburn, new construction across Loudoun County. The plywood moves seasonally and the joist span has measurable deflection. Floating click-lock is the right install. We add a thin acoustic underlayment (cork is our default; the deep breakdown is in our underlayment piece) and hold a 1/4 inch perimeter expansion gap.
Concrete slab on grade. Basement. Either method works in dry conditions. The decision tree starts with moisture testing. A slab below 75% RH (per ASTM F2170 in-situ probe) takes glue-down beautifully. A slab between 75% and 85% RH needs either a moisture-mitigation primer (more cost) or a floating install with a 6-mil vapor barrier underlayment. A slab over 85% RH needs the source addressed before any flooring goes in. That is a drainage and waterproofing issue, not a flooring issue. We test every basement slab before quoting.
Concrete slab upper unit. Condo / high-rise. The HOA sound spec drives the decision. Most DMV condo HOAs (Tysons, DC, Crystal City, Reston Town Center) require IIC 50 or IIC 60+ for hard surface floors. That spec is hit by floating click-lock LVP plus an acoustic underlayment, not by glued LVP direct to slab. We default to floating in every upper-unit condo and pull the HOA spec sheet before recommending an underlayment grade.
Old plank subfloor. 1920s-1940s homes in Del Ray, Cherrydale, Mount Pleasant, Takoma Park, and parts of historic Alexandria often have a 3/4 inch plank subfloor (no plywood, just dimensional lumber laid diagonal to the joists). The planks have shrunk and gapped over 80 to 100 years. You cannot glue-down LVP direct to a plank subfloor. The seams telegraph, the planks move differently from each other, and the install fails inside 2 years. The right move is to install a 1/4 inch plywood overlay over the planks (screwed every 6 inches on a grid), level any high spots, then float the LVP over the overlay. Adds about $1 per square foot to the job and is non-negotiable on these older homes.
Radiant heat slab. Covered in detail in the radiant heat piece. Glue-down with a heat-rated adhesive (Mapei Ultrabond ECO 575) is the right call over hydronic. Floating click-lock works over electric mats with a heat-rated underlayment and a floor-sensor thermostat enforcing the maximum floor surface temperature on the LVP spec sheet (usually 80F to 85F for SPC, lower for WPC. See our WPC vs SPC piece).
What it actually costs
Quick answer
LVP material costs the same whether you install it floating or glued. The labor and the adhesive add roughly $1 to $2 per square foot to glue-down installs. At Potomac Floors, our all-in floating LVP install runs $5.50 per square foot (material, professional install, demo, removal of old floor). Glue-down LVP runs $6.50 to $7.50 per square foot depending on adhesive choice, substrate prep, and room layout. Both prices are all-in. Subfloor leveling above standard prep, moisture mitigation, or plywood overlay on old plank subfloor are quoted separately and disclosed at the in-home estimate.
The cost delta breakdown:
| Line item | Floating click-lock | Glue-down |
|---|---|---|
| LVP material (SPC, 20 mil wear layer) | $2.50 to $3.50 / sqft | $2.50 to $3.50 / sqft |
| Acoustic underlayment (cork or foam) | $0.40 to $0.70 / sqft | Not used |
| Flooring adhesive (pressure-sensitive) | Not used | $0.50 to $0.90 / sqft |
| Labor (residential, 200-600 sqft room) | $1.80 to $2.20 / sqft | $2.50 to $3.50 / sqft |
| Demo and removal of old floor | Included | Included |
| All-in total at Potomac Floors | $5.50 / sqft | $6.50 to $7.50 / sqft |
The full cost context for vinyl plank in the DMV is in our vinyl plank installation cost piece. The hidden-charges piece (what to watch for on flooring quotes) covers the line items that other installers leave off the quote and bill at the end. Our quotes are all-in. The number we quote is the number you pay, regardless of which install method we recommend.
One nuance on cost: a glue-down install that requires substrate prep (self-leveling underlayment on uneven concrete, moisture-mitigation primer on damp slab, plywood overlay on old planks) can move the total by $1 to $3 per square foot beyond the standard glue-down rate. The floating install is more forgiving of minor subfloor variation (1/8 to 3/16 inch over 10 feet is tolerable for most products) and is cheaper when the substrate is just acceptable rather than perfect. This is one of the silent reasons floating wins more often than glue-down in DMV residential.
Subfloor prep: where the methods diverge
Quick answer
Both methods need a clean, flat, dry, structurally sound subfloor. Glue-down is less tolerant of unevenness (most adhesives spec 3/16 inch or less over 10 feet), less tolerant of moisture (most adhesives have an RH ceiling on the substrate), and less tolerant of contamination (old adhesive residue, paint, drywall mud. All of it has to come off). Floating is more forgiving of minor unevenness, can tolerate slightly higher moisture with the right vapor barrier underlayment, and does not care about contamination on the subfloor surface. The same room may need $0 of prep for a floating install and $1,500 of prep for a glue-down install.
Subfloor prep is the silent cost driver on most LVP jobs and the reason that a glue-down quote can come in higher than the homeowner expected after the in-home check. The two methods have meaningfully different requirements:
Flatness. Glue-down LVP adhesive specs almost always read 3/16 inch over 10 feet (and 1/8 inch over 6 feet) as the maximum tolerance. The substrate has to be ground or self-leveled to that spec. Floating LVP click-lock joints typically tolerate 3/16 to 1/4 inch over 10 feet from most manufacturers. The same uneven concrete basement floor may need self-leveler under glue-down ($1.50 to $3.00 per square foot in material plus labor) but no leveling under floating.
Moisture. Glue-down adhesives have a published RH ceiling on the substrate (usually 85% RH, sometimes 90% for premium moisture-managing adhesives). Above the ceiling, you need a moisture-mitigation primer ($1 to $2 per square foot extra) before the adhesive goes down. Floating LVP with a 6-mil vapor barrier underlayment handles higher slab moisture without primer.
Cleanliness. Glue-down requires a contaminant-free substrate. Any residual adhesive from a previous install (yellow mastic from 1970s vinyl tile, black asphalt-based cutback) must come off mechanically. Scraping or shot-blasting. Paint drips and drywall mud must come off. Floating LVP does not care: the underlayment goes over the substrate as-is and the floating panel sits on top.
Structural soundness. Both methods require a sound subfloor (no loose plywood, no broken slab edges, no joist deflection over the product's tolerance). Neither method fixes a structurally bad substrate. The deeper "what we find under your old floor" breakdown is in our subfloor repair piece; common DMV finds include rotted plywood under bathrooms, water-damaged subfloor in basements, and joist span issues in older townhomes.
The honest takeaway: when a homeowner asks "should I get glue-down because it sounds more solid?" the answer often hinges on whether the substrate is willing to take a glue-down install without $2,000 of prep work. We do the in-home check, the moisture reading, and the flatness check before recommending a method.
Sound and feel underfoot
Quick answer
Glue-down feels more solid underfoot. No flex, no hollow sound when you walk on it, sits tight against the substrate. Floating click-lock with a quality acoustic underlayment sounds quieter to the room below. The underlayment dampens impact noise (footsteps, dropped objects, dog claws). For most homeowners in their own primary residence: pick by other factors, both feel fine. For upper-unit condo / townhome installs where the HOA cares about sound transmission to the unit below: floating click-lock with cork or rubber acoustic underlayment is the right answer. For commercial or rental installs where you want a floor that feels permanent: glue-down.
The "feel underfoot" question is real but often overweighted at the showroom. A floating click-lock LVP install with a quality underlayment feels solid in normal residential use. The flex is measured in fractions of a millimeter and is not noticeable in normal walking. Some homeowners can perceive it when stepping near a wall (the floor is technically unsupported at the perimeter), but most cannot. The "hollow" sound complaint is almost always traceable to a cheap thin underlayment or an uneven subfloor that left an air gap between the underlayment and the LVP. Both are install-quality issues, not floating-method failures.
The sound transmission question is where the methods really differ. We do a lot of work in Tysons high-rises, DC condos, Crystal City buildings, Reston Town Center, and Old Town townhomes. HOA specs typically require IIC (Impact Isolation Class) ratings of 50 to 60+ for hard-surface floor installs. The IIC rating measures impact noise transmission to the unit below. Footsteps, dropped objects, dog claws. The rating is met by the floor system as a whole (LVP + underlayment + subfloor + ceiling assembly below), not just the LVP.
Floating click-lock LVP with a 3mm to 6mm cork acoustic underlayment hits IIC 60 to 65 in most assemblies. Comfortably above HOA minimums. Floating LVP with a thin foam underlayment hits IIC 50 to 55, usually acceptable, sometimes borderline. Glue-down LVP direct to the substrate has no underlayment cavity and typically hits IIC 45 to 50 in the same assembly, which fails most upper-unit HOA specs. This is why we essentially never quote glue-down LVP in an upper-unit condo or townhome.
The deeper sound dampening conversation, including IIC vs STC ratings and the per-condo HOA spec landscape, is in our soundproof flooring for condos and townhomes piece. For multi-unit landlord installs, our apartments soundproofing guide covers the IIC 50 minimum for rentals.
Repair, replacement, and lifespan
Quick answer
Both methods last 20 to 30 years in normal residential use with a quality SPC plank and a proper install. Where they really differ: damaged plank replacement. Floating: $150 to $400 to pull up, replace, and re-click a damaged plank in the middle of a room (we work back from a closet or doorway). Glue-down: $600 to $1,200 for the same plank because of the adhesive removal, careful color-match of an aged plank, and the new adhesive cure cycle. Color-match risk is higher with glue-down too: the surrounding floor has UV-aged for several years and a new plank from current inventory does not always match.
Long-term lifespan is the same for both methods when the install is done right. The wear layer thickness drives the lifespan (the 20 mil vs 28 mil tradeoff is covered in our wear layer guide), not the install method. A 20 mil SPC plank installed floating or glued lasts 20 to 30 years in normal residential use. A 12 mil plank either method lasts 8 to 12. Material spec, not install method, drives lifespan.
Repair is where the methods really diverge. A pet household with a large dog dragging toys, a kitchen with rolling appliances getting moved, a kids' room with a heavy bookcase falling over. Any of these can damage a plank. The repair math:
Floating LVP repair. The crew identifies the damaged plank. We work from the nearest closet, doorway, or other natural break in the floor: pull up shoe mold, click-disengage the planks back to the damaged one, replace it, and click everything back together. A trained installer does this in 2 to 4 hours for a typical residential room. Cost runs $150 to $400 depending on labor time. The replaced plank is from your original stock (we leave attic stock with every floating install for exactly this reason) so color matches.
Glue-down LVP repair. The crew cuts the damaged plank out cleanly with a sharp utility knife (scoring the edges, then prying), scrapes the cured adhesive off the substrate without gouging it (slow, careful. This is the time-consuming part), applies a fresh bed of adhesive in the cleaned area, lays the new plank, weights it for 24 hours, and finishes. Trained crew does this in 4 to 8 hours for a single plank. Cost runs $600 to $1,200. The bigger risk: the surrounding floor has UV-aged and the new plank from current inventory will not match exactly. We try to color-match from attic stock or, when no stock exists, from the same manufacturer's current batch (often different from the original install batch).
The replacement-when-you-redo question also matters. A floating floor can be pulled up if you redo the room. Some homeowners pull up the LVP, relocate it to a basement or rental, and put hardwood in the original room. A glue-down floor has to come up with a scraper or floor stripper, the substrate has to be repaired, and the LVP is destroyed in the process. If reuse-someday matters, floating is the better play.
Five mistakes that ruin both installs
Watch out
The five field errors that cause LVP installs to fail in the first 2 to 5 years. Most are committed before the install starts (substrate prep, material acclimation) or at the perimeter (expansion gap, transition strips). Catch them up front and either method holds up the full lifespan.
Mistake 1: Skipping the moisture test on a concrete slab. Both methods fail on a too-wet slab, but they fail differently. Glue-down adhesive releases. Floating LVP cups along the seams as moisture transmits up through the underlayment. The fix is an in-situ RH probe (ASTM F2170) before the install. Takes 24 to 72 hours to read; we test at the in-home estimate or at delivery, never skip it on a basement.
Mistake 2: Insufficient expansion gap on a floating floor. The product spec is 1/4 inch at every wall, doorway, tub flange, toilet flange, hearth, and obstruction. Crews working fast sometimes shave to 1/8 inch to make the shoe mold smaller. The first humid summer or first cold winter, the floor buckles or gaps. Spacers stay in until trim is set; gap is verified before shoe mold goes on.
Mistake 3: Wrong adhesive on a glue-down install. Three failure modes: a vinyl-rated adhesive that is not pressure-sensitive (does not bond LVP correctly), a wood-flooring adhesive used on LVP (wrong chemistry, does not cure), or a generic construction adhesive used to save money (releases under foot traffic within months). The spec sheet on the LVP names the approved adhesive class. We carry Mapei Ultrabond ECO 360, Bostik GreenForce, and Roberts 2310 because they are the most-rated for the SPC products we install.
Mistake 4: No acclimation period. LVP planks come off a truck at warehouse temperature and humidity. Click-lock joints are precision-milled and the plank dimensions change with temperature. The manufacturer spec is 48 hours of acclimation in the install room before the planks go down, with the room at the temperature it will live at year-round (usually 60F to 80F). Skipping it produces seasonal gaps or buckling within the first heating or cooling cycle. We schedule delivery 2 to 3 days before install for this reason.
Mistake 5: Substrate not flat enough. 3/16 inch over 10 feet is the spec for most products on both methods. Crews sometimes look at a basement slab, decide it is "close enough," and start installing. The high spots in the slab make click joints fail (floating) or telegraph through the finished floor (glue-down). The fix is to grind high spots and self-level low spots before any LVP goes down. Adds $1.50 to $3.00 per square foot in problem areas; skipping it costs the homeowner the install.
FAQs about LVP install methods
Quick answer
The seven questions DMV homeowners ask most often about glue-down vs floating LVP, answered in 60 words or less.
Is glue-down LVP better than floating?
Not in residential, no. Floating click-lock is the right install for about 80% of DMV residential rooms over plywood subfloor or upper-unit slab. Glue-down is better for basement slabs in commercial or rolling-load use, large open spaces without a transition strip, and hydronic radiant heat. Either method works in most rooms. The substrate and the room use drive the choice.
Can you install LVP directly on a concrete basement floor?
Yes, both methods work. Verify slab moisture (in-situ RH probe below 75% is ideal, below 85% is workable). Floating with a 6-mil vapor barrier underlayment is the most common DMV basement install. Glue-down with a moisture-managing adhesive works too if the slab is flat and dry. Failed basement installs almost always trace back to skipping the moisture test.
Does floating LVP feel cheap or hollow?
Not when installed correctly. The "hollow" complaint comes from an uneven subfloor that leaves air gaps under the underlayment, or from skipping the underlayment entirely. A quality 3mm cork or rubber underlayment over a flat subfloor produces a solid feel. The "give" at the perimeter is real but measured in fractions of a millimeter and not noticeable in normal walking.
How long does a glue-down LVP install take?
Same install day as floating, but the room is unwalkable for 24 hours after the last section goes down (adhesive cure time). A 400 square foot room takes one full day with a 2-person crew; the homeowner can use the room the next day. Floating click-lock on the same room is walkable as the crew installs and finishes the same day.
Can I install glue-down LVP myself?
Technically yes, in practice we see most DIY glue-down installs fail. The adhesive open time is unforgiving (working too slow lets the glue skin over, working too fast smears it onto the plank surface), the trowel size has to match the adhesive spec, and any contamination on the substrate prevents the bond. DIY click-lock LVP is much more forgiving for a first-time installer.
What if my floor is uneven. Can I still install LVP?
Yes, but the prep cost depends on the method. Floating LVP tolerates 3/16 to 1/4 inch over 10 feet on most products. Glue-down LVP requires tighter tolerance (often 1/8 to 3/16 inch over 10 feet). An uneven concrete basement may need self-leveling underlayment for a glue-down install and no prep for a floating install. We measure the floor at the in-home estimate and quote prep separately.
Does floating LVP work for landlords and rentals?
Yes, with caveats. Floating is the right install for upper-unit rentals (sound spec compliance) and easier mid-tenancy repair. For ground-floor rentals with high turnover and heavy use, glue-down can hold up better long-term. The full rental decision is in our best flooring for rental properties piece.
Bottom line: what we install on most DMV jobs
For a standard residential install in a Northern Virginia or Maryland home (plywood subfloor, single-family or townhome, owner-occupant): floating click-lock SPC LVP with a 3mm cork underlayment over a swept and inspected subfloor. Quick install, solid feel underfoot, easy single-plank repair years later. Default spec, $5.50 per square foot all-in.
For an upper-unit condo or townhome with HOA sound spec compliance required (Tysons, DC, Crystal City, Reston, Old Town): floating click-lock SPC LVP with a 6mm cork or rubber acoustic underlayment specified to the HOA's required IIC rating. Same install method, premium underlayment. Runs slightly higher due to underlayment cost.
For a finished basement over a tested-dry slab (below 75% RH): either method works. We default to floating with a vapor barrier underlayment for most homeowners (easier repair if a future moisture event happens), and switch to glue-down with a moisture-managing adhesive in cases where the basement is also a rental, gym, or commercial use.
For a hydronic radiant heat install: glue-down with a heat-rated adhesive over the substrate. The sustained warmth and slow cycling make floating risky on hydronic over time. Electric mat installs can use either method.
For a great room or open-plan space over 600 square feet in one direction: glue-down if the homeowner does not want a transition strip in the middle of the room. The continuous run looks cleaner and the floor handles the long span without seasonal movement issues.
For old historic homes with original 1920s-1940s plank subfloor: floating click-lock over a 1/4 inch plywood overlay, never glue-down direct. The overlay is non-negotiable.
If you are planning an LVP install in the DMV and want a real quote that recommends the right install method for your specific substrate and room, call Potomac Floors at 571-341-7247 or request a free in-home estimate. We test the substrate, measure the floor for flatness, check moisture on any slab, and quote both methods when the choice is close. The quote is all-in. Material, install, demo, and removal, and we tell you up front when one method clearly wins for your room and when it is a coin flip.